
A GUIDE TO YOUR CUSTOM PIN
Custom Beta Pins.
A Style for Your Story.
A bold mascot, a meaningful message, or a theme your members dreamed up together—start with the idea, then find the pin style that brings it into focus.
Explore enamel and printed options, compare their finishes, and discover details that give your chapter’s design its own personality.
BEGIN WITH THE FINISH
Three Ways to Bring Your Artwork to Life
The right starting point depends on your artwork and the look you want. Here’s how the main styles differ.
Texture & defined color
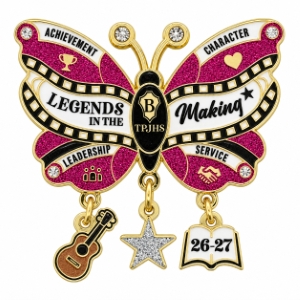
Soft Enamel
Recessed color sits between raised metal borders, creating a finish you can feel.
Smooth & Polished
Hard Enamel
Enamel and metal meet at a level surface for a clean, polished appearance.
Detail & Blended Color
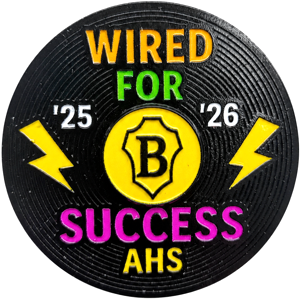
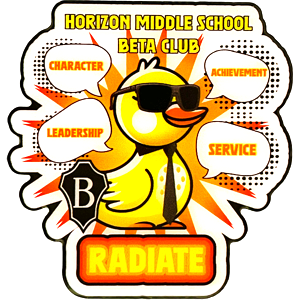
Photoscreen
Printed artwork allows fine details and color transitions without metal dividers between every color.
SOFT ENAMEL
Bold Color, A Finish With Character
If you picture strong outlines, colorful shapes, and a classic pin feel, soft enamel is a useful place to begin. The metal gives the artwork structure while the recessed color adds depth.
✓ Distinct metal outlines around color areas
✓ A textured surface with visible dimension
✓ Room to explore custom shapes and enamel effects
HARD ENAMEL
A Smooth Take on Chapter Pride
Hard enamel brings a more uniform surface to your design. The filled areas are polished level with the metal, creating a smooth finish across the face of the pin.
✓ Flush enamel and metal on the front surface
✓ A polished look suited to a simple, balanced design
✓ Defined shapes and lettering framed by metal

PHOTOSCREEN
Keep the Detail
That Makes It Yours
Some ideas rely on brushstrokes, shading, or colors that blend together. Photoscreen printing offers a way to carry that visual detail into your pin without dividing the whole image into enamel sections.
✓ Gradients and multicolor artwork
✓ Fine lines and intricate graphic elements
✓ A printed alternative to separated enamel fills
MAKE THE DESIGN YOUR OWN
Small Details
Extra Personality
Choose an accent that supports the idea behind your pin. A single thoughtful detail can be enough to give members something to notice, show off, or trade.
Availability depends on the pin style and design. Discuss additions before finalizing artwork and pricing.
Glitter
Add sparkled to selected areas.
Danglers
Attach a smaller piece beneath the main pin.
Cutouts
Use open spaces as part of the shape.
Spinners
Give part of the artwork a rotating element.
Sliders
Build a moving detail into the composition.
Glow in the Dark
Highlight selected areas with a glow-in-the-dark option.